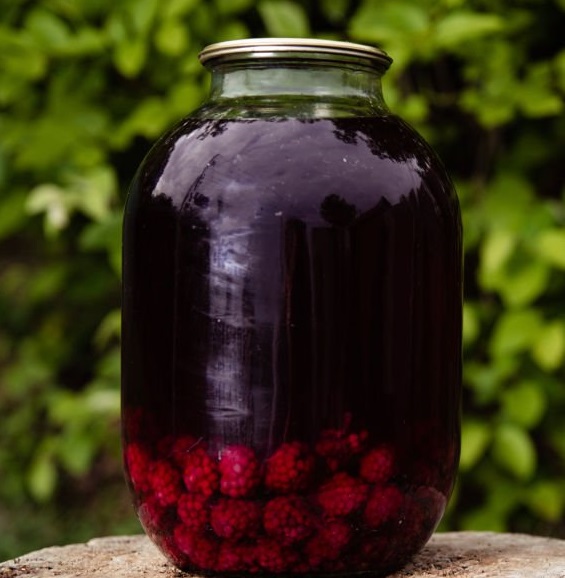
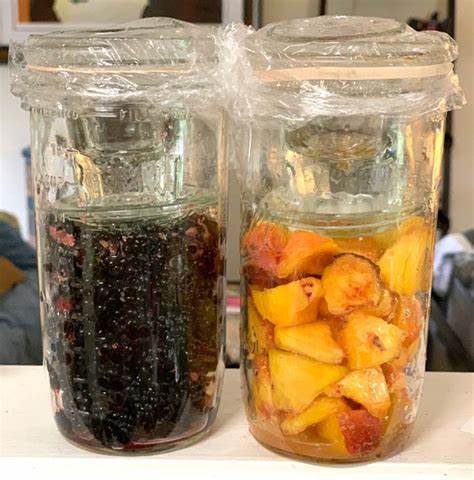
As someone who loves foraging and experimenting with wild ingredients, I’ve discovered that making wild fermented cider with blackberries or raspberries is an incredibly rewarding experience. Preserving these delicious berries from the spring and summer foraging season allows me to create a unique and flavorful beverage. In this guide, I’ll Walk you through the process of making wild fermented cider using your foraged berries, with easy-to-follow steps and tips.

Why Choose Wild Fermentation?
Wild fermentation is a fascinating process that harnesses the natural yeasts and bacteria present on fruits, allowing them to transform into a bubbly, tangy drink. I love wild fermentation because it connects me to the environment and offers a taste that store-bought options simply can’t match. Each batch tells a story of the place and time it was made.
Gathering Ingredients
To make wild fermented cider with blackberries or raspberries, you’ll need the following ingredients:
- Foraged Berries: Blackberries or raspberries work best. I typically use berries I’ve preserved by freezing them during the summer. If you’ve got fresh berries, even better! Make sure they are ripe and free of mold.
- Water: Filtered or spring water is ideal. I always avoid tap water because of the chlorine and other chemicals that can inhibit fermentation.
- Sugar: Adding sugar helps kickstart the fermentation process. I prefer using raw cane sugar or honey for a more natural sweetness.
- A fermentation vessel: A glass jar or a food-grade plastic container works well. I often use a quart-sized mason jar for small batches.
- Cheesecloth or breathable lid: This allows air to flow while keeping out contaminants. I love using a rubber band to secure cheesecloth over the jar.
Step 1: Prepare Your Berries
Start by thawing your frozen berries if you’re using preserved ones. Once thawed, mash the berries gently with a fork or potato masher in your fermentation vessel. I like to leave some whole to add texture to the cider.
Tip: Save a few whole berries to add to your finished cider for a beautiful presentation!
Step 2: Mix Ingredients
Once the berries are mashed, it’s time to mix in the other ingredients:
- Add Water: Pour about 4 cups of filtered water into the jar with the mashed berries. Stir gently to combine.
- Add Sugar: Stir in about 1/2 to 1 cup of sugar, depending on how sweet you want your cider. I usually start with 1/2 cup and adjust later if needed.
Step 3: Fermentation
Cover the jar with cheesecloth or a breathable lid, securing it with a rubber band. This allows wild yeasts from the environment to enter while keeping contaminants out.
Place the jar in a warm, dark area (around 65-75°F) for about 5-7 days. I usually check on my fermentation daily, giving it a gentle stir. You’ll notice bubbles forming and the mixture will start to smell fruity and tangy.
Tip: If you see any mold forming on the surface, simply skim it off. It’s a normal part of the wild fermentation process.
Step 4: Strain and Bottle
Once fermentation is complete, you’ll want to strain the liquid from the solid berry pulp. I find that using a fine mesh strainer or cheesecloth works best for this step. Pour the liquid into clean bottles, leaving a little space at the top.
If you like your cider sparkling, you can add a teaspoon of sugar to each bottle before sealing. This will create a secondary fermentation, adding carbonation.
Step 5: Carbonation (Optional)
Seal the bottles tightly with caps or corks. Let them sit at room temperature for 1-2 weeks for carbonation. Check them regularly to prevent over-carbonation, which can cause bottles to explode.
Once they are fizzy enough for your taste, transfer them to the refrigerator to slow down fermentation.
Enjoying Your Wild Fermented Cider
Now comes the fun part: tasting! I love serving my wild fermented cider chilled and garnished with fresh berries or a sprig of mint. The flavor is complex, tangy, and slightly sweet—perfect for warm days or cozy evenings.
Creative Serving Ideas:
- Use it as a mixer in cocktails.
- Pour it over ice for a refreshing spritzer.
- Pair it with cheese or charcuterie for a delightful snack.
Essential Tools for Wild Fermented Cider
When I make wild fermented cider, I rely on a few essential tools:
- Mason Jars
I use quart-sized mason jars for fermentation and storage. They’re versatile and easy to clean. Get yours here. - Fine Mesh Strainer
A good strainer helps separate the liquid from the pulp efficiently. I love how quickly it works! Check it out on Amazon. - Bottles with Caps
For storing the finished cider, I prefer reusable bottles with caps for easy carbonation control. Find them here.
Safety Tips
While wild fermentation is generally safe, it’s essential to use clean equipment and fresh ingredients. I always ensure my jars and tools are sterilized to prevent unwanted bacteria. If your cider smells off or develops unusual colors, it’s best to err on the side of caution and discard it.
Wrapping Up
Making wild fermented cider with blackberries or raspberries is an enjoyable and rewarding experience. Preserving these delicious berries from the spring and summer foraging season allows me to create a unique beverage that showcases the flavors of nature. I hope this step-by-step guide inspires you to try your hand at making wild fermented cider and enjoy the fruits of your foraging labor. Click here for more wild food recipes. Cheers to your foraging adventures!

As an Amazon Associate, I earn from qualifying purchases. This means that if you click on an Amazon affiliate link on this site and make a purchase, I may earn a commission at no additional cost to you. All product recommendations and reviews are my own, based on personal experience and research. Your support helps keep this site running, and I greatly appreciate it.
Foraging for wild edibles like chickweed (Stellaria media) can be a rewarding and enjoyable experience, but it is essential to approach it with caution. Always positively identify any plant before consuming it, as some plants can be toxic or harmful. Consult reliable field guides or experts in wild foraging if you’re uncertain about a plant’s identity. Additionally, be mindful of your local environment and foraging regulations. Only harvest plants from areas that are free from pesticides or pollutants and be respectful of nature by not overharvesting. If you have allergies or health concerns, please consult a healthcare professional before trying new wild edibles. Enjoy your foraging adventures responsibly!
